Game Progress Route for Final Fantasy 7 Remake presents a recommended progression path for the main campaign of the game, it aims to provide important points of the game to avoid any missing important aspects such as relevant Locations, NPCs, Items, as well as involved boss encounters. For guides on quests, click here, if you want to check a detailed guide for each location, you may visit our Walkthrough page.
- See New Game Plus for details on what unlocks after completing Chapter 18.
Final Fantasy VII Remake Game Progress Route
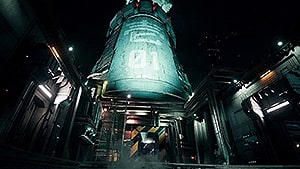
Chapter 1: The Destruction of Mako Reactor 1
- Enter the Reactor Grounds
- Infiltrate the Reactor by following Barret
- Breach Security
- Reach Mako Storage by following Jessie
- Set the charge.
- Defeat Scorpion Sentinel
- Escape from the Reactor
- Sprint to Safety.
Once the gate is unlocked, head inside and follow the group while you defeat the enemies along the way. Once you set the charge, the Scorpion Sentinel will appear. Defeat him and head backwards using the stairs. Make sure that you escape before time runs out.
Chapter 2: Fateful Encounters
- Use the escape route
- Reach the Sector 8 Station
- Follow Him
- Taking a Detour
- Evade Pursuers
- Fight through the City
- Climb to the Roof
- Break the Blockade
- Last Train
Once you reach town, you'll have to walk through the street heading towards the station. You will see a vision of Sephiroth along the way. Follow him through the alley and defeat the enemies on the other side. Keep moving until you reach the fountain plaza. Defeat all the enemies and then climb to the rooftops. Once on the other side, fight the officers until a cinematic plays where you jump to the train. Once aboard the train, keep walking and talk to Jessie to reach the next area.
Chapter 3: Home Sweet Slum

- Return to Base
- Noisy Neighbors
- Life in the Slims
- A Job for the Neighborhood Watch
- Problem Solving
- Shinra Reacts
- Talking Strategy
- Ominous Shadows
- The Jessie Job
Upon arriving Sector 7 Slums, head to the 7th Heaven to collect Cloud's payment. Although the payment is still not in full, Tifa, a childhood friend of Cloud, uses her connections to get him an apartment. Once Cloud has rested, speak to Marle, the landlady of the apartments, then help Tifa with the collections. After helping Tifa, Biggs asks for your help to exterminate some monsters at Scrap Boulevard, doing so will help Cloud to make a name for himself in the slums, and thanks to Tifa, people are starting to know and learn more about Cloud. Johnny is then arrested by Shinra Troops on suspicion of stealing blasting powder, Tifa, on the other hand, worries Johnny might slip and tell details about AVALANCHE and decides to rescue him. Back at 7th Heaven, Barret holds an impromptu meeting and decides not to include Cloud in the next mission, as Cloud leaves the bar, he sees suspicious men stationed at the front. After chasing the men who were trying to gather information about Barret, he returns to Stargazer Heights where he finds Jessie who is waiting to give Cloud a new job request which involves the Sector 7 plate.
In Cloud's room in Sector 7 Slums, before Chapter 3 ends, players will be able to obtain the Ifrit Materia as a downpayment for Jessie's job. Chapter 4 will begin at the Corkscrew Tunnel with Jessie, Biggs, and Wedge. You'll have to reach the Shinra employee housing area of sector 7 via motorbike while also fighting against Shinra troops and Roche, a 3-C SOLDIER operator. Upon reaching the housing area, the group heads over to Jessie's house where Cloud's mission for Jessie's job begins. Cloud is asked to sneak into their house and to grab the Shinra ID Card from Jessie's dad. The ID that Jessie needs will help her sneak into Sector 7-6 Annex to grab explosive agents that she can use to create a new bomb that will be used for the next mission. As she infiltrates the annex section, she asks the three men to create a diversion. Later on, Cloud faces Roche again in a duel. Cloud wins the battle but is surrounded by more Shinra troops until they are saved by an unknown group of terrorists who fights against the Shinra company. The team then heads over to an open lot to rendezvous and sneaks their way out through the plate and back to the slums of Sector 7 via parachute. As Cloud and Wedge land, Cloud accompanies Wedge back to his house and checks on Jessie and Biggs shortly after. With the job being a success, Cloud returns to his room and rests.
Chapter 5: Dogged Pursuit
- All Aboard for Sector 4
- Separate Ways
- Looking for a Friend
- Get your Bearings
- Find Stamp
- Secret Passageway
- The Road to Mako Reactor 5
As soon as Chapter 5 starts, Tifa rushes to Cloud's room to show him the swarm of entities that have appeared in the area. Tifa and Cloud fight against a swarm of Mysterious Spectre enemies as they make their way back to Seventh Heaven bar where Barret and Jessie are also fighting the unknown entities. During the battle, Jessie gets injured and sprains her leg, forcing Barret to decide on ordering Jessie and Wedge to stay behind and to have Cloud join the mission in destroying Mako Reactor 5. As Tifa, Barret, and Cloud head to Sector 4 via the train, they are caught and ambushed by sentry weapons of Shinra, the team decides to jump off the train and to rendezvous with Biggs on foot. The objective of this chapter is to work your way through the tunnel of the train and to defeat the Crab Warden before reaching the cargo lift that leads to Sector 4 - Plate. There's a music disc, 28. Stamp, which you can purchase from the vending machine for 50 Gil, the vending machine is located before reaching the area where you fight the Crab Warden. On the other hand, successfully defeating the Crab Warden will also reward the party with a new weapon for Tifa, Metal Knuckles.
Chapter 6: Light the Way
- Head for Section G
- Head for Section H
- Power for the Platform
- To the Cargo Platform
This chapter begins at Section G of Sector 4 - Plate. The goal is to turn off three sun lamps to power up the facility in order to reach Biggs' position. When the team finds that there is no power, they'll learn at the control room that they will need to turn off the sun lamps to transfer power to the facility. There are two Discovery events here that can be triggered. One is the Collapsed Passageway and Inside the Ventilation Fan, both events are found though Sector H where Cloud will need to retrieve the Elemental Materia from the collapsed walkway and the Chocobo & Moogle Materia from the ventilation fan. The collapsed walkway can be reached at the lower section of Section H. While the ventilation fan can be reached via riding a lift near the large cargo lift that leads to the objective. You will need to deactivate all three lamps first for the lift to have power. Upon reaching Biggs, before the chapter ends, the team receives a new weapon for Barret, a Light Machine Gun apart from other items.
Chapter 7: A Trap is Sprung
- Reach Mako Storage
- Escape from the Reactor
- Sentenced to Death
- Storm the Gates
The chapter starts in the storage area of Mako Reactor 5, players will simply need to reach the core of the reactor just like in Chapter 1 and set the bomb. Things turn out differently however once the team escapes the area. They are trapped by Heidegger and are forced to look for another route to escape the facility by facing more of Shinra's troops and mechanical weaponry.
As you maneuver your way through the facility, you will come across multiple assembly control rooms where you will need to choose and disable various parts of the Airbuster by accessing control panels that can alter its behavior when you face it near the end of this chapter. There are four rooms that you will encounter, before reaching the fourth room, you can find a new weapon for Tifa, a pair of Sonic Strikers.
Eventually, you will reach the exit, but you'll need to unlock it by disengaging the emergency locks. Simply operate the levers the same direction and time Tifa moves it. In the same room where the levers are, you can also disengage the locks of the door that leads to the waste recovery room which triggers a Discovery event: Waste Recovery. Players will need to operate the second panel of levers to unlock it. Inside the room, not only will you be able to collect the parts you chose to remove from the Airbuster, but you can also find 1x Magic Up Materia.
On the other side of the exit, make sure to check the vending machine where you can purchase a new music disc: 2. Bombing Mission for 50 Gil. The next objective from here and to complete the chapter is to escape the facility and to defeat the Airbuster.
Chapter 8: Budding Bodyguard
- Second Change Meeting
- Escape from the Church
- Head for the Station
- The Station
- Through the Backstreets
- Sector 5 Slums Monitor
- To Aerith's House
- Leaf House Delivery
- Danger in the Hideout
- Escort the Children
- Requests for the Mercenary
- The Price of Strength
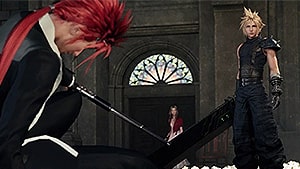
After the intense battle against the Airbuster in Mako Reactor 5, Cloud falls off from the reactor and lands in the church of Sector 5 Slums where he is miraculously saved by the bed of flowers. Here, you'll be able to finally meet Aerith Gainsborough, however, shortly after, Reno, a member of the Turks along with Shirna troops infiltrate the church to take Aerith in. You will have to fight the soldiers and Reno before escaping the church from the attic. As you reach the rooftops of the slums, work your way around until you reach the scrapyard where Aerith joins the party.
In the scrapyard, when you find a gate, a Discovery event will trigger where you will have to work your way around the scrapyard to reach the other side of the gate where you'll be able to unlock it. This will only open up a shortcut for future use, but the objective is to reach the residential area via the scrapyard section. Upon reaching the residential area, players will need to accompany and follow Aerith back to her house and deliver some flowers to the leaf house.
After meeting Elmyra, Aerith's foster mom, and collecting the flowers, you will be able to explore the residential area after delivering the flowers. A couple of things to find, on the left side of the Leaf House, there's a house for the elderly where you can grab a music disc, 25. Tango of Tears from the jukebox. You can purchase another music disc, 19. Costa del Sol from the Materia Shop. You can also find Chadley near the shop, make sure you speak to him to unlock your first VR Mission against a Summon entity. If you complete the children's side quest, you'll be able to obtain the Nail Bat, a new weapon for Cloud.
Once you're done exploring the area, head back to the Leaf House and speak to Aerith to trigger the next objective which is to help out Oates and the rest of the kids in their hideout. You will be able to unlock the side quests for this chapter after helping Oates. Make sure to complete all six side quests and to return to the church to find 1x Chakra Materia before heading back to Aerith's house. If all that is done, on your way to Aerith's house, you'll come across Rude, another member of The Turks. You will need to fight him before you can proceed. Right after the battle, if you were able to complete all six side quests for this chapter, another Discovery event will trigger, The Language of Flowers.
A cutscene will trigger here after following Aerith in the garden. Make sure to grab the MP Up Materia from the flowers after the cutscene. When that's done, head back to Aerith's house where Elmyra will ask Cloud to leave in the middle of the night. As Cloud is able to leave the house and tries to find his way to get back to Sector 7, he'll be surprised to find Aerith at the exit of Sector 5 Slums.
For this chapter, Aerith will join the party and guide Cloud back to Sector 7 through the shortcut via the collapsed expressway of Sector 6 Slums. Make sure to get the Binding Materia and Magnify Materia when you are operating the mechanical arms. Also, when you reach a dead-end, you'll find a vending machine and a bench, you'll be able to buy a new music disc from the machine which is 22. Cosmo Canyon for 50 Gil. Eventually, you will reach the park where Aerith shows Cloud an underground shortcut that leads back to Sector 7. Unfortunately, as Cloud leaves, he sees Tifa in a carriage being brought to the Wall Market for an "audition". Aerith pushes Cloud to chase after Tifa and to save her from Don Corneo.
When you reach the entrance of the Wall Market, you'll need to speak to the Stablehand first and then Sam to find out about Tifa's whereabouts which is at Corneo's mansion. Head to the mansion and you'll find Leslie by the entrance alongside Corneo's lackeys. He won't allow Cloud nor Aerith inside and mentions that they'll need to collect endorsements from the trio, which is Chocobo Sam, Madam M, and Andrea Rhodea.
Before speaking to Chocobo Sam, you'll want to grab a few things first around the district. Near the entrance, there's an alleyway on the left side where you'll find a jukebox playing 8. Under the Rotting Pizza, interact with the jukebox to grab the disc. On the right side of the entrance, there's an item shop, the Wall Market Pharmacy selling another music disc: 10. Honeybee Inn. If you followed Johnny at the backside bar, if you head up the stairs where he ran off to, you'll find a Barrier Materia. On the opposite side of where the materia is, there are some stairs where you'll find another bar at the top. You'll find a cowgirl by the entrance. Speak to her to grab the 17. Farm Boy music disc. Next, near Corneo's mansion, on the left side before the Wall Market Weapons Shop, there's a karaoke bar that you can find. Speak to the guy singing on stage to obtain the 29. Midgar Blues music disc. Apart from that, make sure to buy the Hardedge weapon from the weapons shop to obtain a new weapon for Cloud.
When you're done exploring the area, speak to the Trio. The objective here is pretty linear where you'll have to participate in Corneo's Colosseum as per Madam M's request in exchange for getting an endorsement from her. After winning at the colosseum, make sure to participate in the challenges to obtain the Legacy: Ascension and Legacy: Planet's Protection manuscripts which unlock the Level 2 Limit Break of Cloud and Aerith, Ascension and Plante's Protection. Next, you'll have to meet with Madam M at her parlor and have Aerith change. While she gets ready, you'll be given side quests, completing either A Dynamite Body or Shears' Counterattack rewards you with a new weapon for Aerith, the Arcane Scepter.
After completing the quests, check on Aerith back at the parlor and then proceed to the mansion to speak to Leslie. Next, you'll need to head to the Honeybee Inn to meet with Andrea Rhodea. During the tutorial of the dance mini-game, you need to hit "Great" 10 times to obtain 26. Let the Battles Begin! REMAKE. After the dance-off between Andrea and Cloud's makeover, head to the mansion and present the endorsements to Leslie Kyle. Once the trio has been called out, make sure to buy 11. Don of the Slums from the vending machine. After a series of cutscenes, you'll play as Aerith alongside Tifa, and you'll have to fight Corneo's lackeys to reach Cloud. Head inside Corneo's office and his bedroom to complete this chapter.
Chapter 10: Rough Waters

- Escape to the Surface
- Follow the Waterway
- Crossing the Trunk Line
- To the Sector 7 Slums
- To the Surface
After confronting Don Corneo, the team falls down to the sewers of sector 6. After Cloud checks up on Tifa and Aerith. A gigantic pet of Corneo appears and a boss battle against Abzu starts. After fighting Abzu, the objective is to reach the surface by following the waterway.
When you reach the first aqueduct and after you drain the water, make sure to check the bottom level to find a new weapon of Tifa, a pair of Feathered Gloves. As you progress, you will also come across a vending machine that sells a music disc, 9. The Oppressed for 50 Gil. Upon reaching the trunk line, after clearing the first section, you'll be able to find a Poison Materia from the upper platform.
Next, after passing the trunk line, you'll want to take a detour first when you trigger the main scenario: To Sector 7 Slums. A Discovery event, On the Other Side, will trigger when you see a materia on the other end of the bars. Instead of going to the marked objective, take a detour first and explore the west side of the area to reach the other end where you can grab the Warding Materia. After grabbing the materia, proceed to the next section and operate the pumps with Tifa and Aerith to drain the water. From here, simply head to the exit while fighting off enemies along the way.
Back at the surface, you'll be at the Train Graveyard that's near Sector 7 Slums. Make sure to check the first section to find a new weapon for Aerith, the Mythril Rod. It's inside a purple chest on the east side. Before reaching the facility, you'll be able to grab 1x HP Up Materia from where you fought the Cripshay enemies. At the facility section, you'll need to work your way around to reach the control room, along the way there are chests scattered around which you'll want to make sure you check to grab items such as consumables and 1x Gothic Bangle.
Upon reaching the control room, make sure to check the vending machine so you can purchase a music disc: 6. Let the Battles Begin! for 50 Gil. In the control room, a boss fight against the Ghoul will trigger. After defeating it, you will need to retrace your steps and activate the crane panel to bring the train car down. This will enable the team to cross the other side of the facility. Once you're at the exit, operate the turntable and fight more enemies. On the other side of the abandoned section, you will need to move the train cars in order to pass.
Eventually, you will reach the marked objective where you will fight the second boss for this chapter, Eligor. Make sure to have one of the members equip the Steal Materia onto the one who has high Luck so that you can steal the Bladed Staff from it, which is a new weapon for Aerith. Defeating the boss will complete this chapter.
Chapter 12: Fight for Survival
- Head for the Pillar
- Link Up with Avalanche
- Evacuation Orders
- Saving Marlene
- To the Top
- Showdown
Upon arriving at Sector 7 Slums, it seems Don Corneo's information seems to be true where Shinra plans to drop the pillar onto the resident's area to take out AVALANCHE. The goal is to head to the top of the pillar and to reach the rest of the team such as Biggs, Jessie, and Barret. For each floor that you reach, make sure to clear out and search each level first before heading up the next to find some Shinra boxes you can destroy and some chests containing items.
Eventually, Tifa joins Cloud until they reach the top where Barret fights off Rude and Reno in a helicopter. Before you reach Barret, make sure to have either Tifa, Barret or Cloud equip the Steal Materia, preferably the one who has higher Luck so that you can steal the Magician's Bracelet from Reno and the Heavy-Duty Bracer from Rude.
Chapter 13: A Broken World
- Through the Rubble
- Words of Hope
- Checking on Friends
- Crawling to the Surface
- Home is Where the Heart is
- In Solitude
- Finding Wedge
- Return
As the pillar on Sector 7 collapses onto the slums area, Tifa, Barret, and Cloud find themselves in Sector 6 Slums and must return to Sector 7. You'll first head to Aerith's house where Barret finds Marlene. In the room where Marlene is resting, you'll find a chest that has 1x Mythical Amulet. The next objective is to head to Sector 7 via the Collapsed Passageway you took in Chapter 9 with Aerith. Eventually, you'll reach the park area, make sure to check the weapons shop vendor who is now at the park to buy Barret's new weapon, Big Bertha. From there, take the service tunnel which Cloud was originally supposed to take in Chapter 9 to reach Sector 7.
Upon reaching Sector 7 Slums, you'll find Wedge. Just about reaching him, the floor collapses and the team is separated in Shinra's underground test site. As Barret, you will have to find Tifa and rendezvous with her. Work your way back to the surface to where Wedge is and you'll fight a group of Unknown Entity enemies as well as the Failed Experiment boss as Tifa and Barret. Successfully defeating the boss rewards the player with a new weapon for Tifa, a pair of Mythril Claws - this will also complete the mission and regroup with Cloud.
Chapter 14: In Search of Hope
- Resolve
- Intel Gathering
- Through the Underground Waterway
- The Hideout
- Recovering the Key
- Fateful Decisions
- For the Reunion
- Over the Wall
After uncovering Shinra's secret site, the team decides to infiltrate Shinra's HQ. But in order to do that, they will need to gather information. You'll want to take this opportunity to complete all the side quests that are open for this chapter and to revisit the previous locations such as the Wall Market. You'll be able to fast travel now as well using the Chocobo carriages. If you've cleared all 9 Side Quests, head to Corneo's mansion at the Wall Market and proceed to Corneo's bedroom to find Leslie, you'll need to work your way around the sewers and use Corneo's hideout to reach the collapsed plate of sector 7.
Chapter 15: The Day Midgar Stood Still
- A Broken City
- The Climb
- Hiding in Plain Sight
- The Path to Greater Heights
- Flight of the Valkyrie
- In Hot Pursuit
- To the Top of the Plate
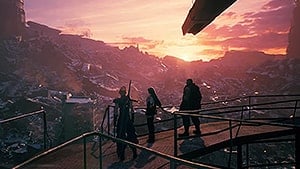
After being able to cross the wall, Tifa, Cloud, and Barret reach the collapsed plate of Sector 7. The objective is to reach the top of the plate for this chapter. The majority of the enemies you'll encounter here are Shinra troops and mechanical weapons, so make sure to have the Fire Materia and Lightning Materia equipped to hit its weakness. Once the main scenario, The Path to Greater Heights is triggered, make sure to check the vending machine to purchase a music disc: 5. Lurking in the Darkness for 50 Gil. Before the chapter ends, the trio will have to face another mechanical boss, The Valkyrie.
Chapter 16: The Belly of the Beast
- Infiltration
- Bust Out of the Garage
- Shinra Building Intel
- Acquiring the Keycard
- Reach for the Skyview Hall
- Playing the Tourist
- A Helping Hand
- Reconnaissance
- Operation: Save Aerith
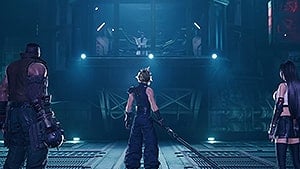
Tifa, Cloud, and Barret infiltrate Shinra HQ to save Aerith. The team will have to infiltrate the building via the parking garage. Enemies such as Shinra troops and mechanical sentries will be encountered in this location. Once you reach the lobby section, all the doors on the second floor are locked and you'll need a keycard to gain access. Tifa will volunteer to try to reach the stall where the keycard is by swinging and jumping on the hanging platforms and lights. When you play as Tifa, at some point, she will fall down and will need to climb back up. Back on the ground, make sure to check the area to find a chest. When you climb up the first purple structure, instead of heading up, cross the monkey bars on the right to find a chest where you can obtain a new weapon for her, the Purple Pain. After grabbing the weapon, proceed to the objective to grab the Shinra Keycard.
Once you have the keycard, the team will have to reach the Skyview Hall on the 59th floor. You can choose to take the stairs or the elevator, but before heading up, make sure to check the showroom on the right side of the second floor to find a chest containing an Iron Maiden. Upon reaching the Skyview Hall, Cloud will need to update the access of his keycard, but in order to do that, he will need to play as a tourist and check each showroom. Eventually, the team will reach a theater room and will be greeted by a guy named Hart who brings them to Mayor Domino.
Mayor Domino upgrades the access of Cloud's keycard to gain access to the 63rd floor. After speaking to the Mayor, make sure to speak to Hart who is outside the office to obtain some information and a new weapon for Barret, the EKG Cannon in exchange for 10,000 Gil. Upon reaching the cafeteria level on the 63rd floor, on the corner right side, you'll find a jukebox playing 31. Scarlet's Theme, interact with the jukebox to grab the music disc. Next, speak to the attendant at the middle of the cafeteria by the combat simulator, you'll need to win the combat simulation to gain the Shinra Executive Keycard to reach the conference room on the 64th floor. You can also find Chadley next to the same employee.
On the 64th floor, you will need to find a way to eavesdrop onto President Shinra's meeting. Proceed to the male toilet and use the vents at the end of the cubicle. In the vents, at the second split, turn left and you'll find 1x HP Up Materia. After eavesdropping onto the meeting, head back to the entrance and follow Professor Hojo into his laboratory. Here, you'll have to fight a boss against Specimen H0512. After the battle, the team will be able to save Aerith and meet Red XIII, Cloud, later on, faints while having a flash of images appear in his head.
Chapter 17: Deliverance from Chaos
- A Way Out
- Find the Others
- The Ominous Trail
- The Showdown
- The Great Escape
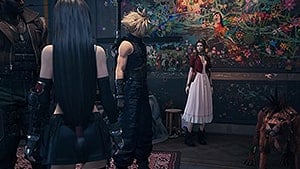
Being able to save Aerith and meeting a new friend, the team is now complete. The objective is to find a way out of Professor Hojo's laboratory and to escape Shinra HQ. At the starting point which is Aerith's room when she was young, you'll find a chest where you can grab the Reinforced Staff, another weapon for Aerith. Upon reaching Jenova's pod, Sephiroth appears and cuts down the walkway they are on, causing them to fall down the area below and separating the team again into two parties, Cloud, Red XII, while Aerith with Tifa, and Barret on his own. As Cloud, you will find Red XIII first and then Barret. There will be a lot of switching parties here to explore different wards which are on different floors. During the main scenario: Find Barret, when you are on the main section of the laboratory, you'll find a chest along the way that has Cloud's weapon, the Twin Stinger.
The first boss the team will encounter is the Swordipede. Cloud and Barret will first encounter this, and then Tifa, Aerith, and Red will be the next to finish it off. At some point, as you progress, the team will be able to regroup before reaching the rooftop area where they'll fight against the second boss, the Jenova Dreamweaver. After the Dreamweaver, make sure to rest at the bench to prepare for another boss battle between Cloud and Rufus and Darkstar. Once you win the battle, the next will be between The Arsenal and Tifa and Barret. This chapter will be completed after fighting the last boss.
For the last chapter, the team will be escaping on vehicles on the Midgar Expressway. The team will be pursued by Shirna troops and mechanical enemies before facing the Motor Ball, the first boss for this chapter. After the battle, the team will stop in the middle of the road before facing the Whisper Harbinger and Sephiroth inside the field. So make sure to replenish your items, use the bench and make further preparations before entering.
Successfully defeating Sephiroth ends the chapter, finishes the first part of the game, and unlocks NG+ where players can rerun chapters - all Weapons, Armor, Accessories, and Materia are also carried over.

